
Purging Data
Purge allows you to permanently delete any unwanted records including associated media files, notification history and jobs (even if the job hasn’t been completed).
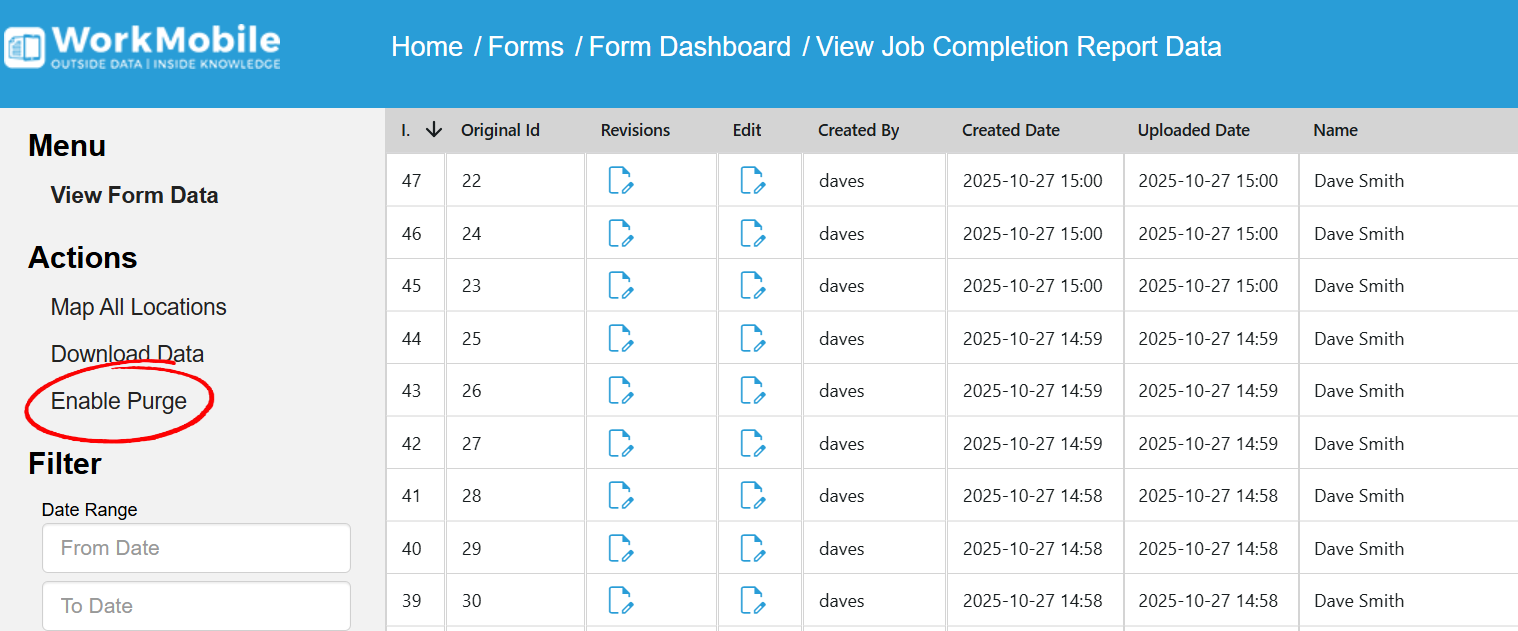
- In order to enable purge, you must first log into your WorkMobile account, go into the Studio and select Forms from within the left-hand menu and select the form you require.
- From within the Form Dashboard, select View Data where you should now see a list of completed record entries.
- Select Enable Purge
- You now have the option to individually select each record by ticking the Purge check boxes. If you have a large amount of records to select, it may be easier to click Select All then untick any records you wish to retain.
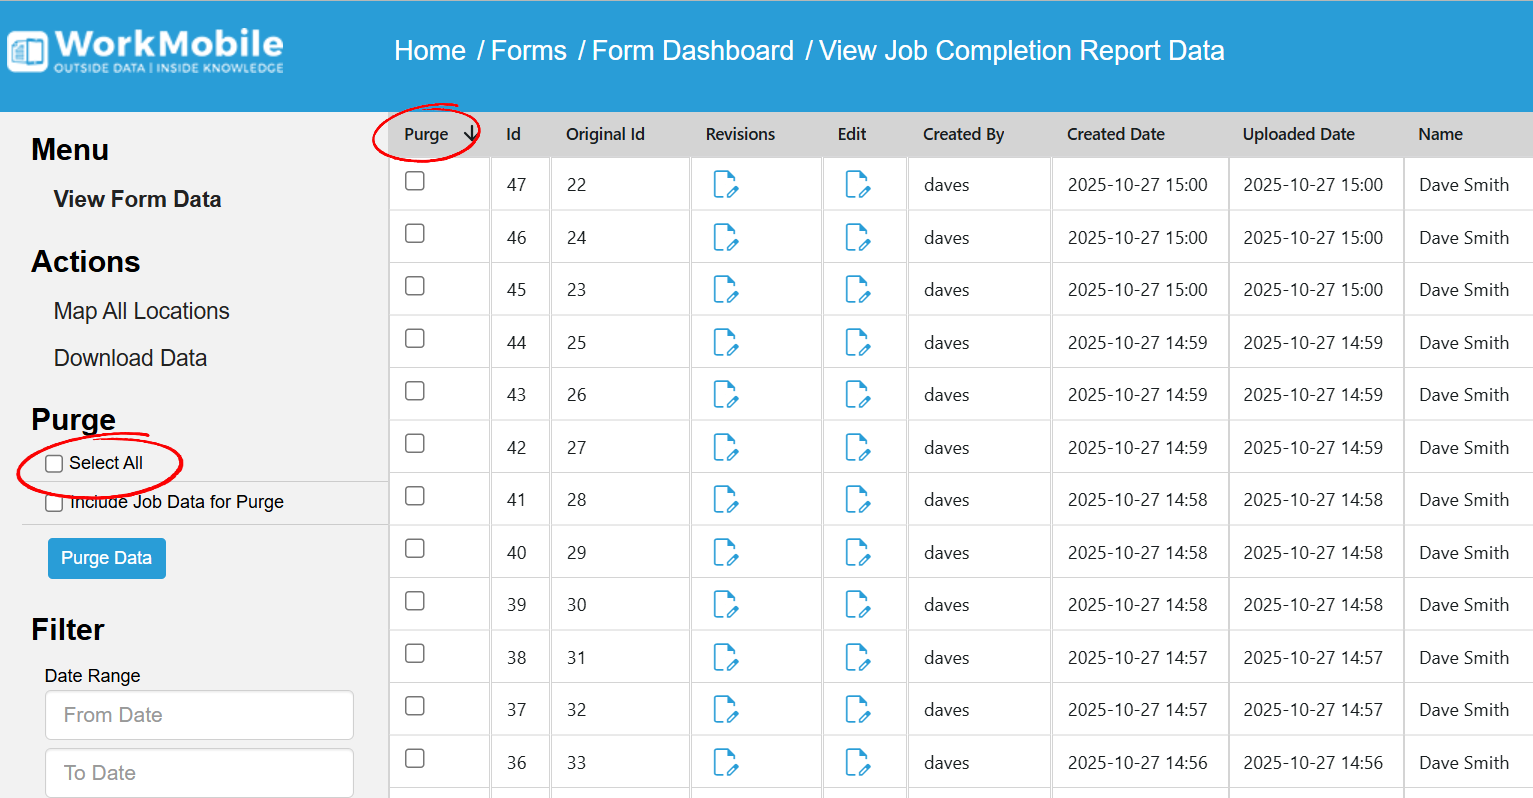
- If you choose not to Select All then you can individually tick the records you wish to erase. If you have any job data that requires purging then select the Include Job Data for Purge checkbox.
Please Note – It may be worth checking through each row of data to see if you have ticked the correct boxes, otherwise you may lose important data and once it is gone, it’s gone.
- When you are ready to delete your data, select Purge Data
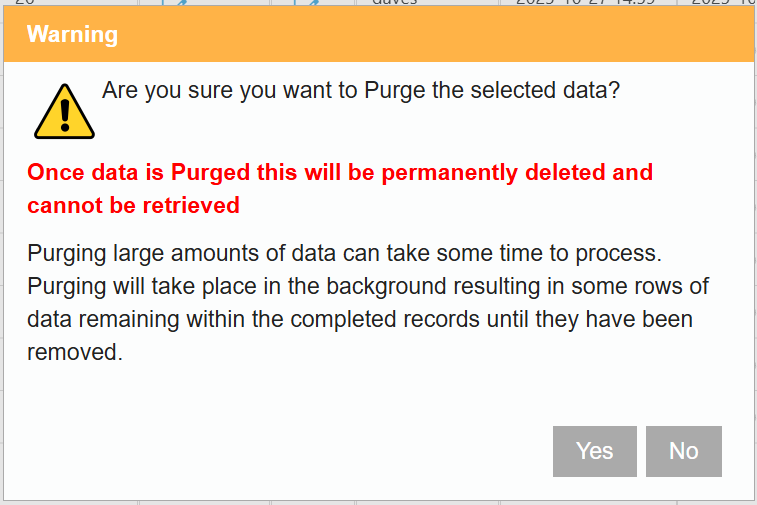
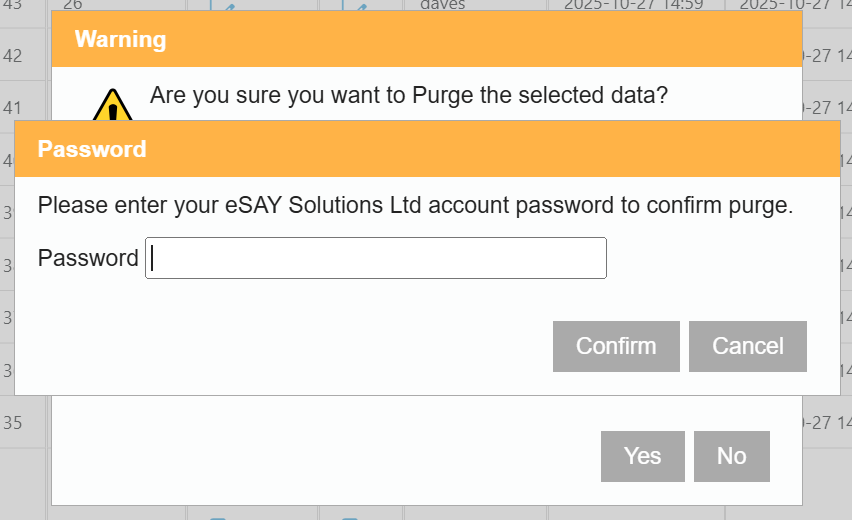
- Once you have selected Yes, you will be asked to enter your password. After you have done this, hit confirm.
- Refresh your completed records to confirm data has been purged.