
Making some improvements
Using Expressions to Default the Calendar Date
You may have noticed that when you opened up your form on the WorkMobile App, the date of the calendar defaulted to some date in the past. To make our solution more usable, wouldn’t it be great if we could default the date to today's date. Well, using expressions we can do just that so let’s find out how.
A Note on Expressions
If you’ve ever used Excel, then you’ve probably used some form of expression or formula to carry out a calculation. WorkMobile uses a similar approach and allows you to write expressions which are placed into the controls on your form.
These expressions can be used for a variety of reasons such as carrying out validation and calculations. If you’re interested in seeing the full range of functions available, you can click this link to find out more.
If you want to default the date of the calendar control to today's date then follow these simple steps.
- Select the Job Sheet form from the list of form entries and select Edit Form.
- From within the form designer, select the Visit Date widget.
- Within the properties panel, you should see a box labelled Values. Click within the Formula box and a new dialogue should appear. Type in the following expression:
=today()
- Your screen should look like the below:
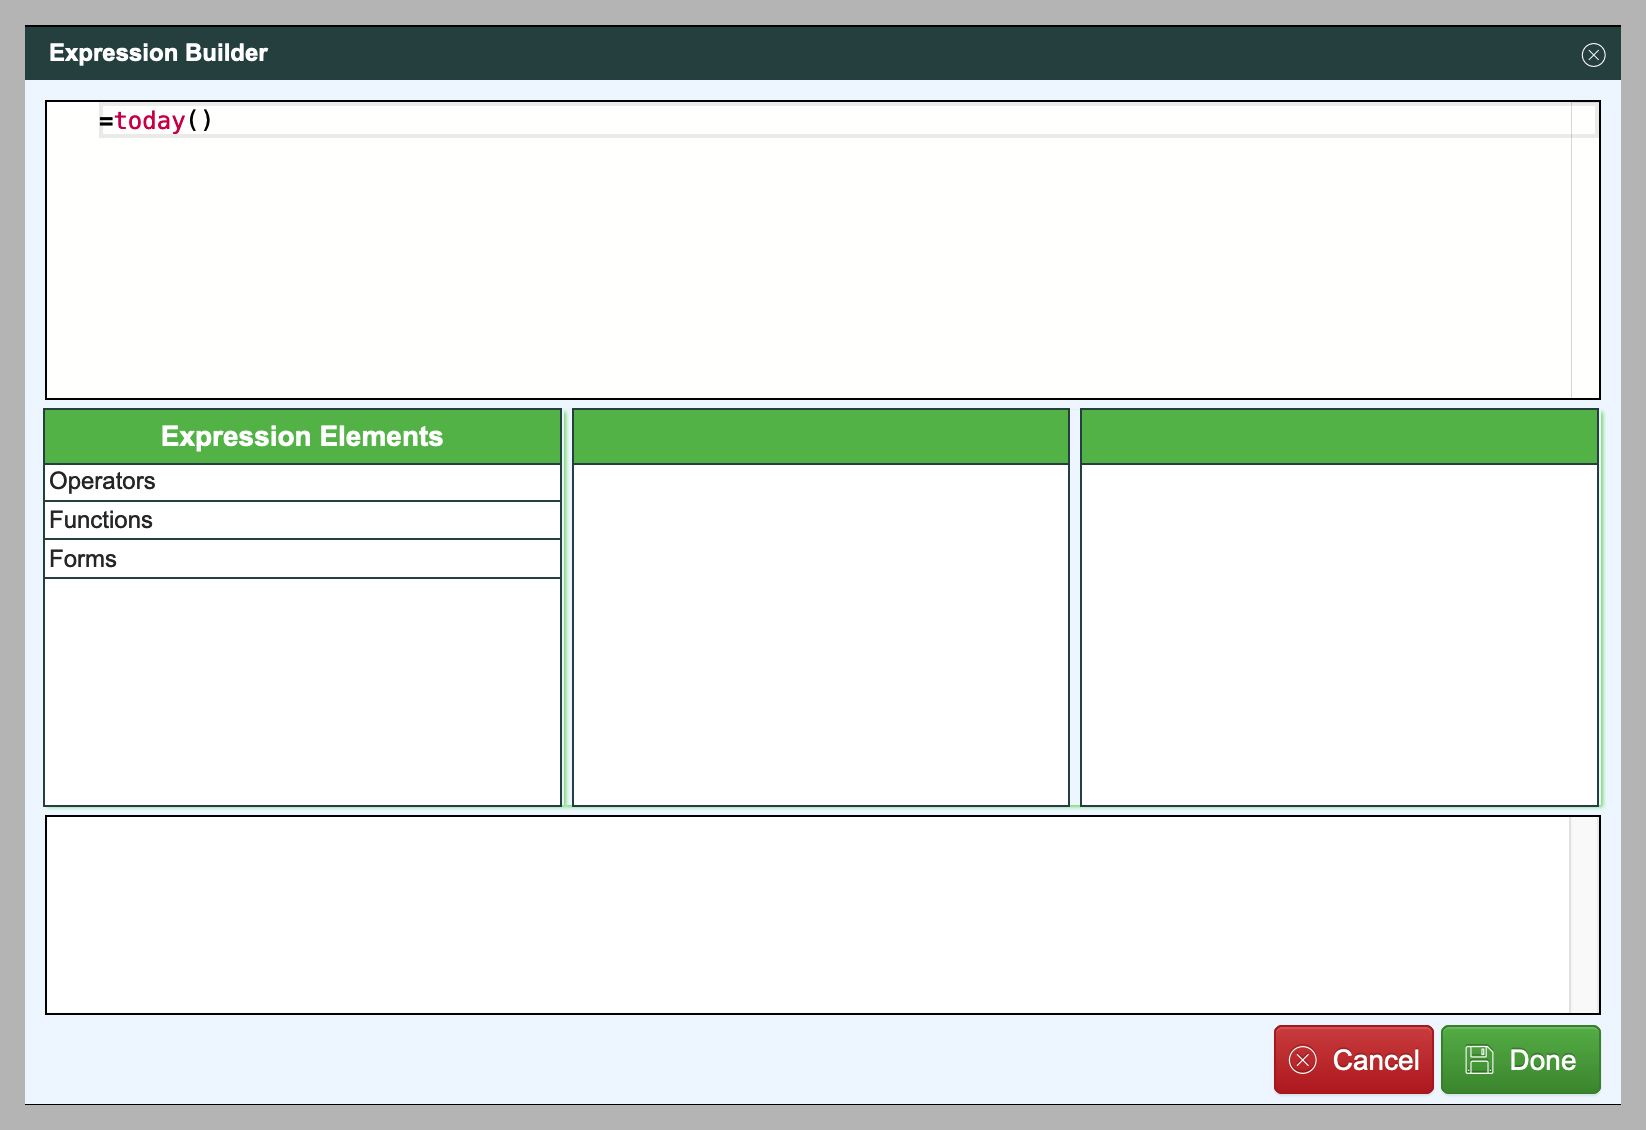
- Click Done and then Save & Close within the form editor.
Try using the mobile app again to create a new record. You'll see that the Visit Date now defaults to todays date.
Making Your Form Location Aware
Once you move from the world of paper to using an App to capture data, you’ll want to begin using some of the additional technology that smart phones and devices have available to them.
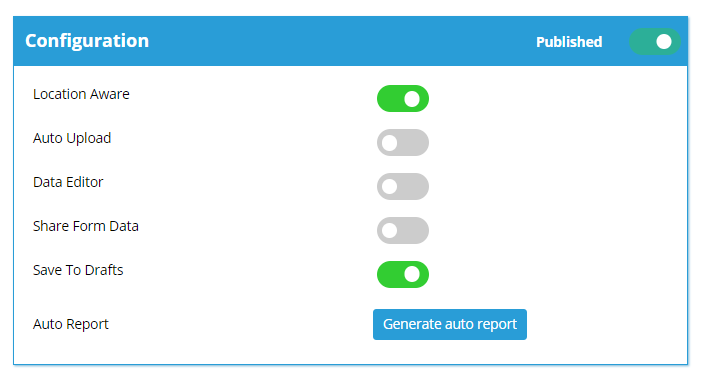
One thing that you may want to do, is to automatically record the location that your mobile user saved their mobile form. We can do this very simply by making your form Location Aware. To do this:
- Click Forms from the main menu and select your form from the list.
- On the forms dashboard, click the Location Aware toggle to enable it.
Now try adding another record using the mobile app. Once it's been sent, view the completed record on the portal as you've been shown on previous tutorials. One the row, you'll see a link containing the address within the Location column.
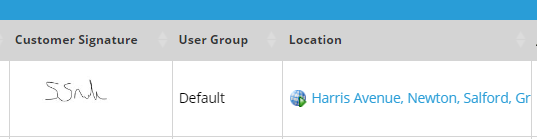
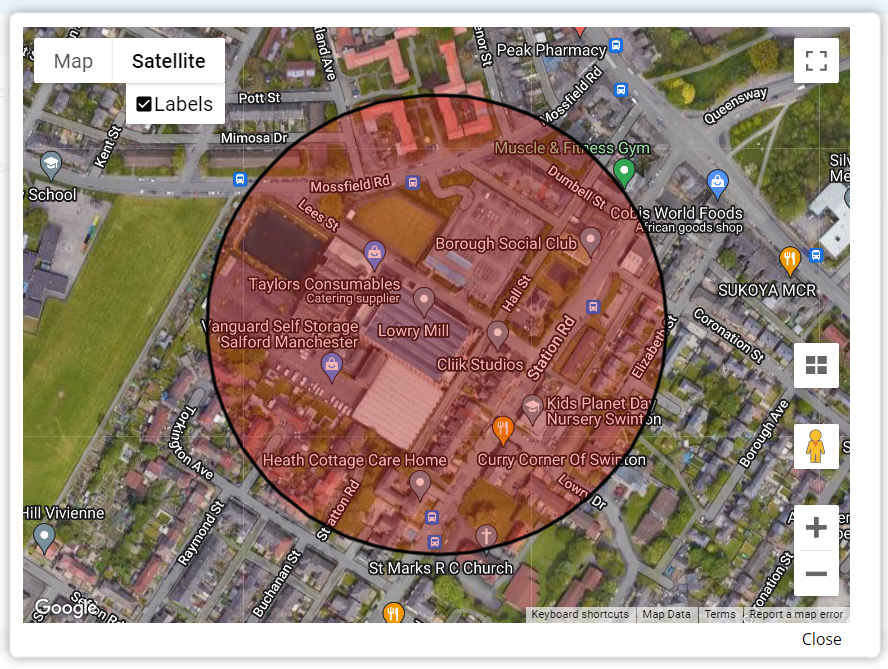
Clicking the link will take you to a Google Map showing the location and accuracy of the GPS location that was captured.
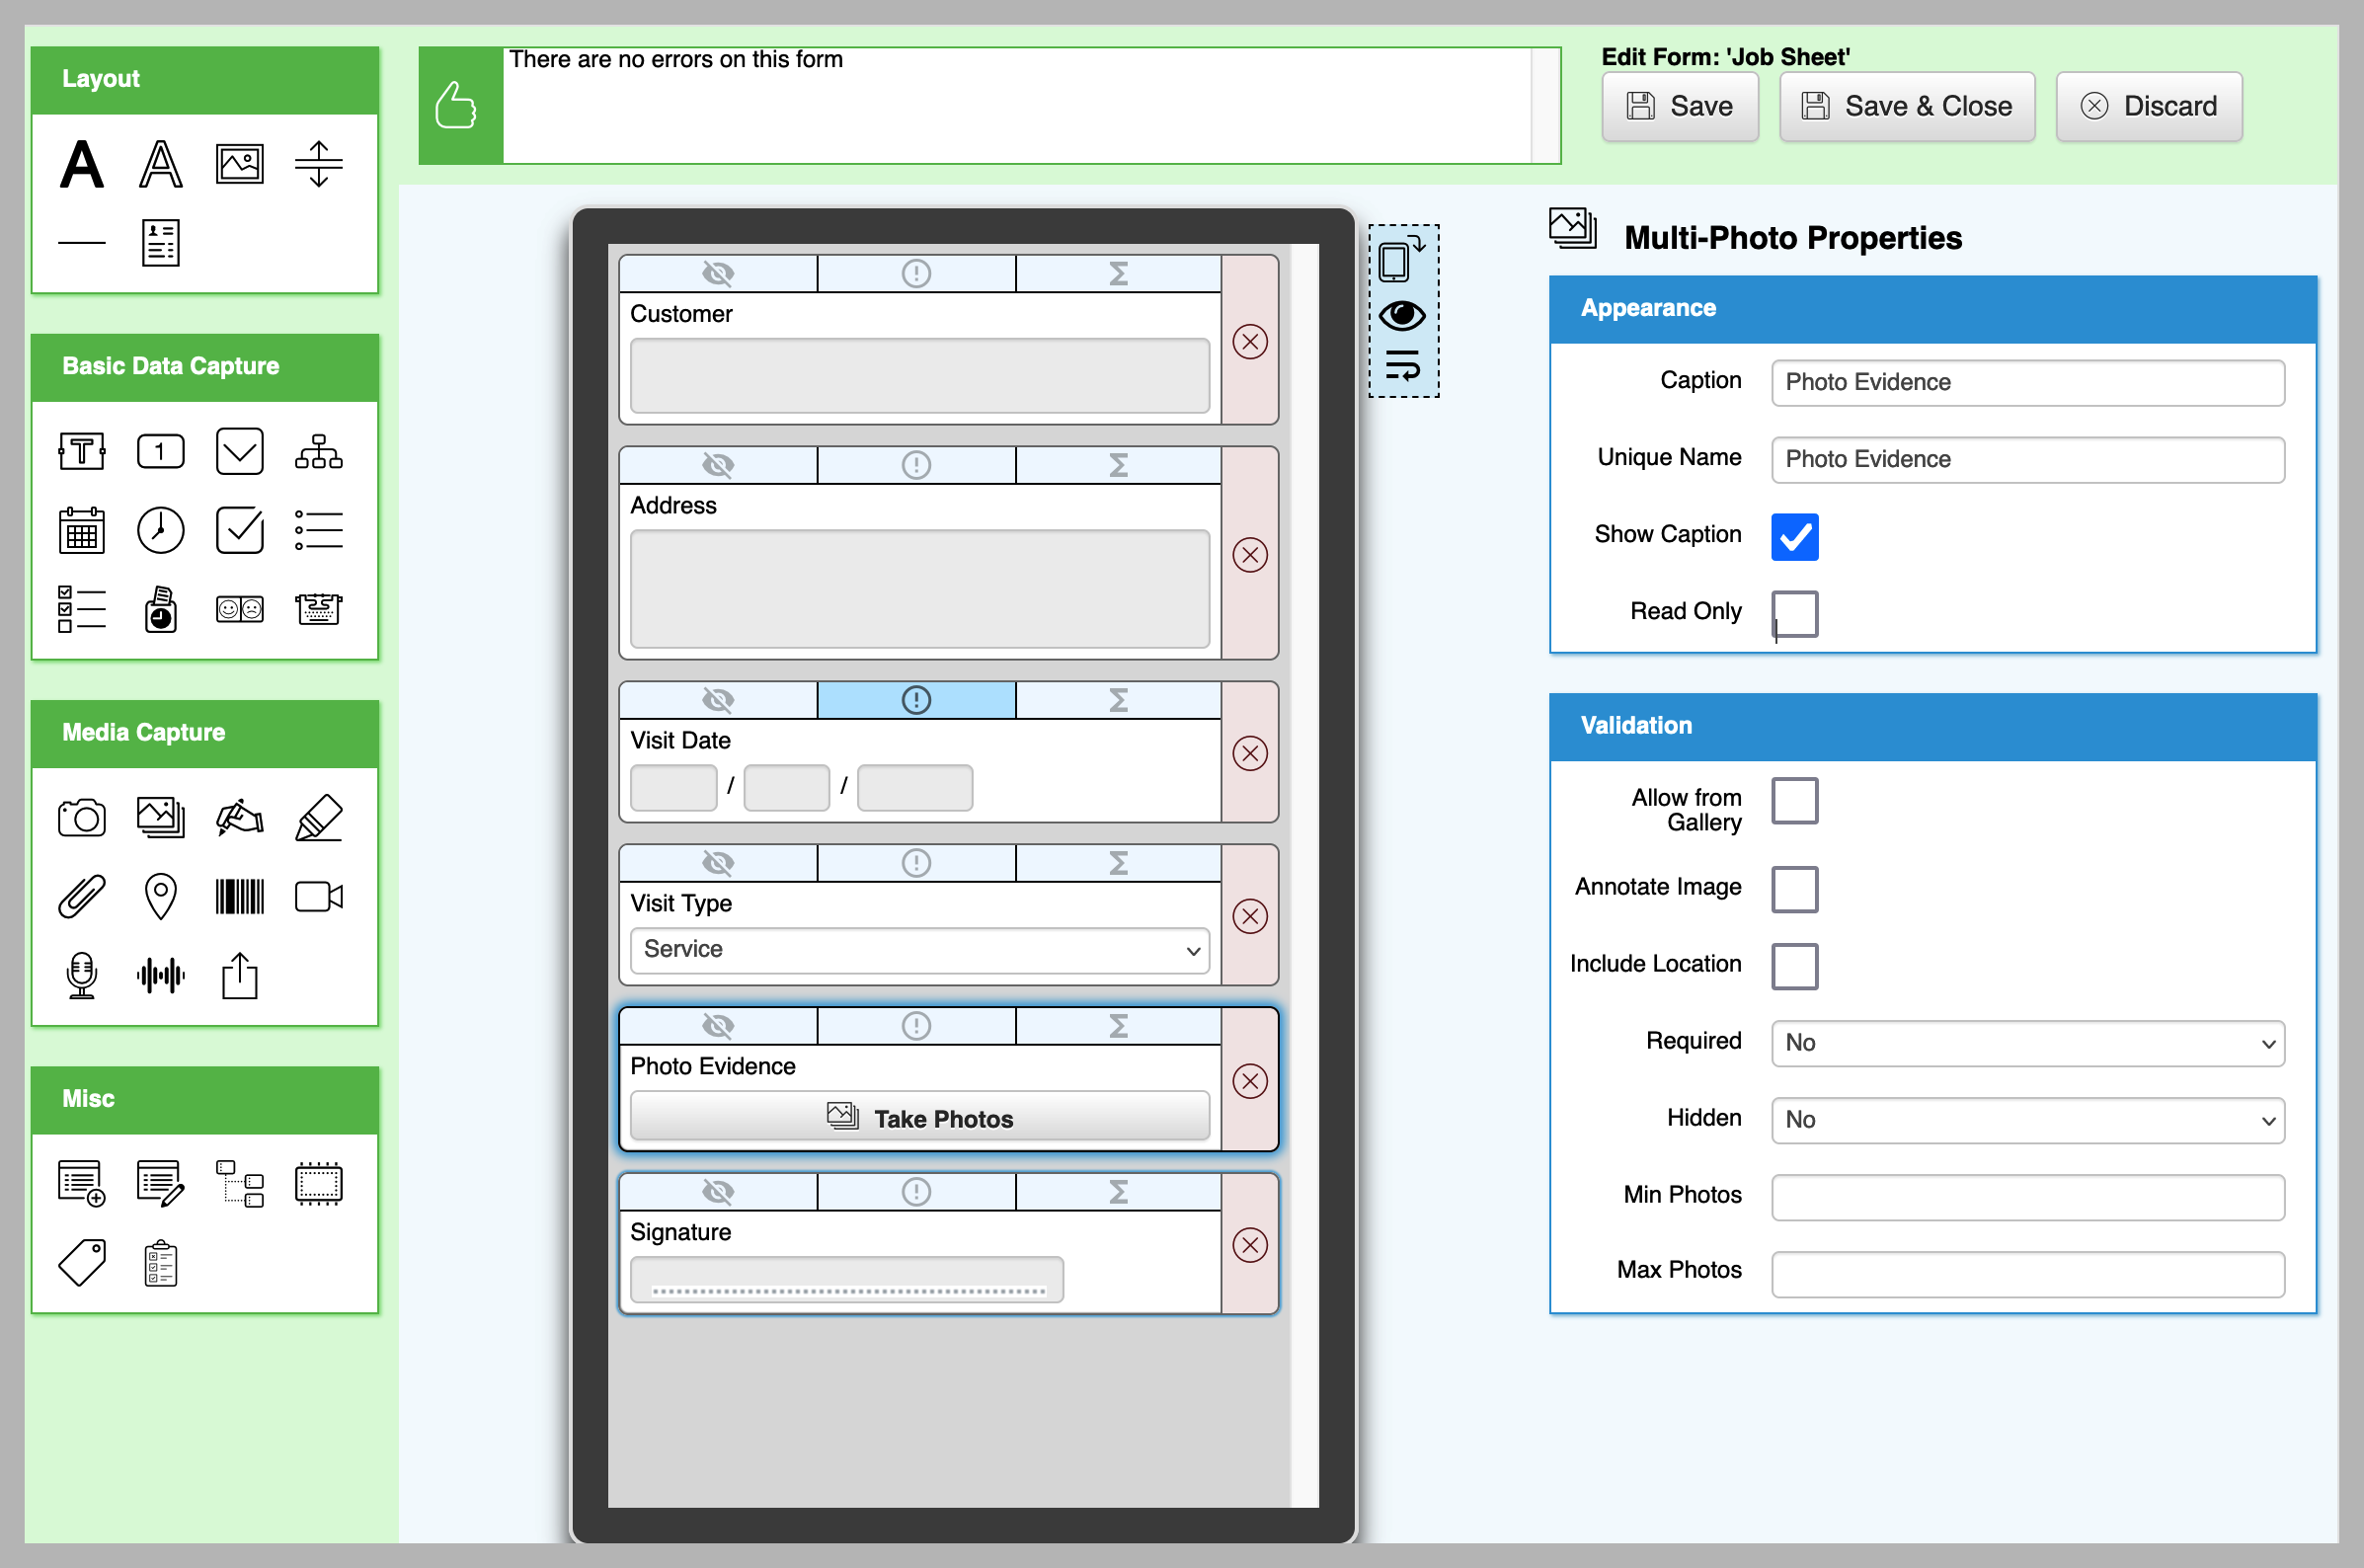
Using the camera to capture photographs
Many businesses with a mobile workforce have processes that require photographs to be captured. Let's make another change to our form in order to do this:
- Click Forms from the main menu and select your form from the list.
- Click Edit Form.
- Drag the Multi-Photo widget
from the toolbox onto your form. In our example we've added it in just before the Signature widget.
- Within the properties panel, change the Caption to something such as Photo Evidence.
- Click Save & Close.
For more information regarding the properties that are available to configure the photo and multi-photo widgets, click here and here
Once again, try adding another record using the mobile app and try taking some photographs. Once the record has been sent, log back into the portal to now view your completed data and review the photographs.