
Data Link Drop Down List
Data Link Drop Down List

For example, choose a product category from the first list and then the next dropdown will display the list of products within the selected product category. The list is 'driven' using a csv file which needs to uploaded first.
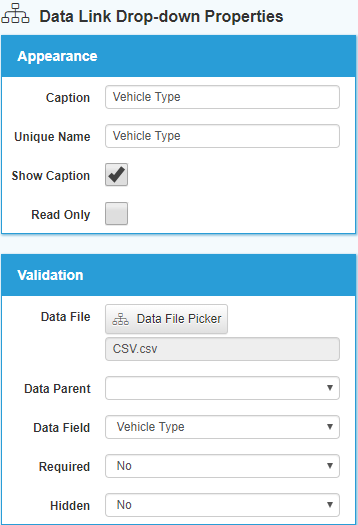
| Property | Description |
|---|---|
| Data File | The name of the uploaded file containing the data for the data link drop down |
| Data Parent | If this is not the root or parent list, then is used to denote which parent list should drive the data within this list |
| Data Field | Specifies which column in the data file this list should take it's data values from. |
Preparing the .CSV file
The .csv file you choose for your data link drop-down list needs to have columns in the order (from left to right) that you wish to filter the following answers. There needs to be a row of data for every combination of answers allowed, in the following example, there is a simplistic table based on vehicles. You would need to add this information into a spreadsheet and save it as a .csv file to use it with the data link drop-down.
| Vehicle Type | Size | Colour |
|---|---|---|
| Car | Large | Black |
| Car | Large | Blue |
| Car | Small | Red |
| Car | Small | White |
| Bus | Single | Green |
| Bus | Double | Blue |
| Bus | Double | Purple |
| Bicycle | Large | Black |
Using the .csv above, if you were to select Bus you could choose Single or Double, then the colour options associated with single or double buses. The controls are linked and the choices make a cascade of options available to the user.
Creating the Data Link Drop-down
In this section, we will use the above table as our .csv file. To begin you will need to navigate to the Forms page and select New Form from the left-hand menu.

- Name the form and Save
- Click the Data Link Drop-down List Control
- In the Properties section, click Data File Picker, a pop-up window should appear.
Adding the .CSV
There are two options to upload the .csv file, you can find the file in your documents and Drag and drop the data file onto the section labelled Drag and drop a data file here to select it. Alternatively, you can click Select File and find the document within your document libraries on the computer. Once a file has been selected you then need to click Upload File.
Things to remember:
- If you upload a file with the same name as one already stored on WorkMobile, it will overwrite the stored file. You can avoid this by entering a Unique file name
- If you are unsure which file you need to pick, you can preview the data by clicking the preview icon.
- If a data file is not in use on any other form, you can delete it using the bin icon.

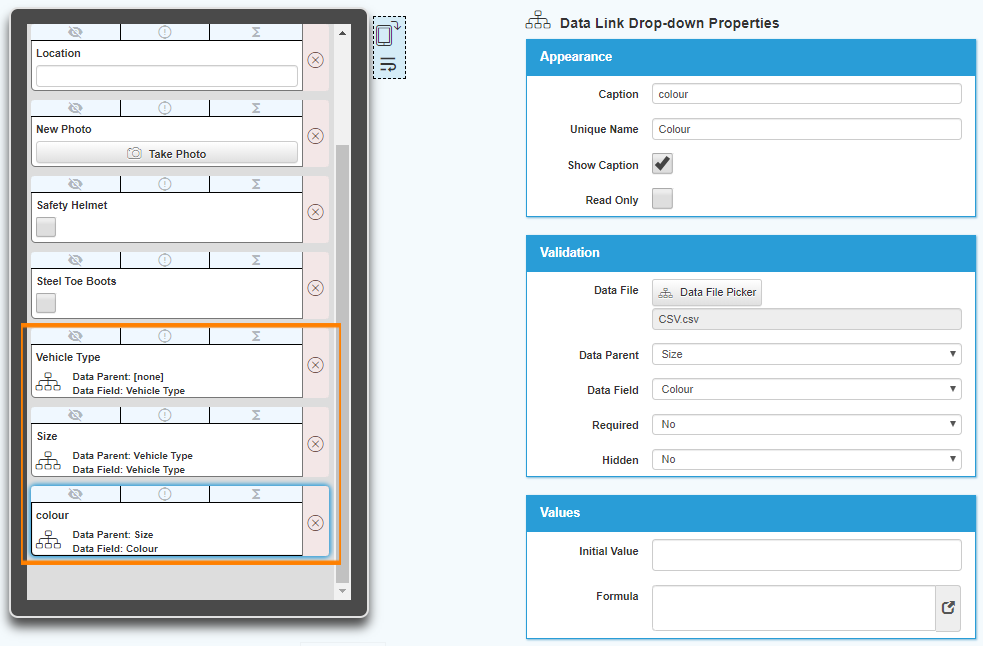
Mapping the Data Link Drop-down
For the first control you add, you only need to map the Data Field section. Data Field refers to the column heading from your .csv file, so in this instance you would need to select Vehicle Type from the drop-down list. You will need a data link drop-down control for every column in your .csv file, so in this case, you will need to add a subsequent two controls and follow the above steps.
Adding and Linking the Data Link Drop-down lists
- Add a new control, change the Caption to the column name
- Add the .csv file through the Data File Picker
- Select the previous control from the Data Parent
- Select the column heading from Data Field
All the controls must have the same .csv file or they will not connect, and they must be in the order of the columns on the .csv file.
On the Device
Once the form has been saved and published, you should be able to view the data link drop-down on the device.
