
Creating Filtered Views
Filtered Views offer the users the opportunity to create custom filters and views on their completed data that can be saved and re-used, enabling the users to quickly and easily access the specific data that they want.
Data can be filtered based on information captured from the mobile device, the mobile user who captured it, or on the dates that records were captured and uploaded to make sure that you are only seeing what you need to see.
Filtered Views will be set up and configured within the main WorkMobile Studio and then accessed and viewed within the WorkMobile Workspace.
Accessing the Filtered View Page
Filtered Views can be accessed either through the WorkMobile dashboard or through the Form Dashboard of the specific form you want to use.
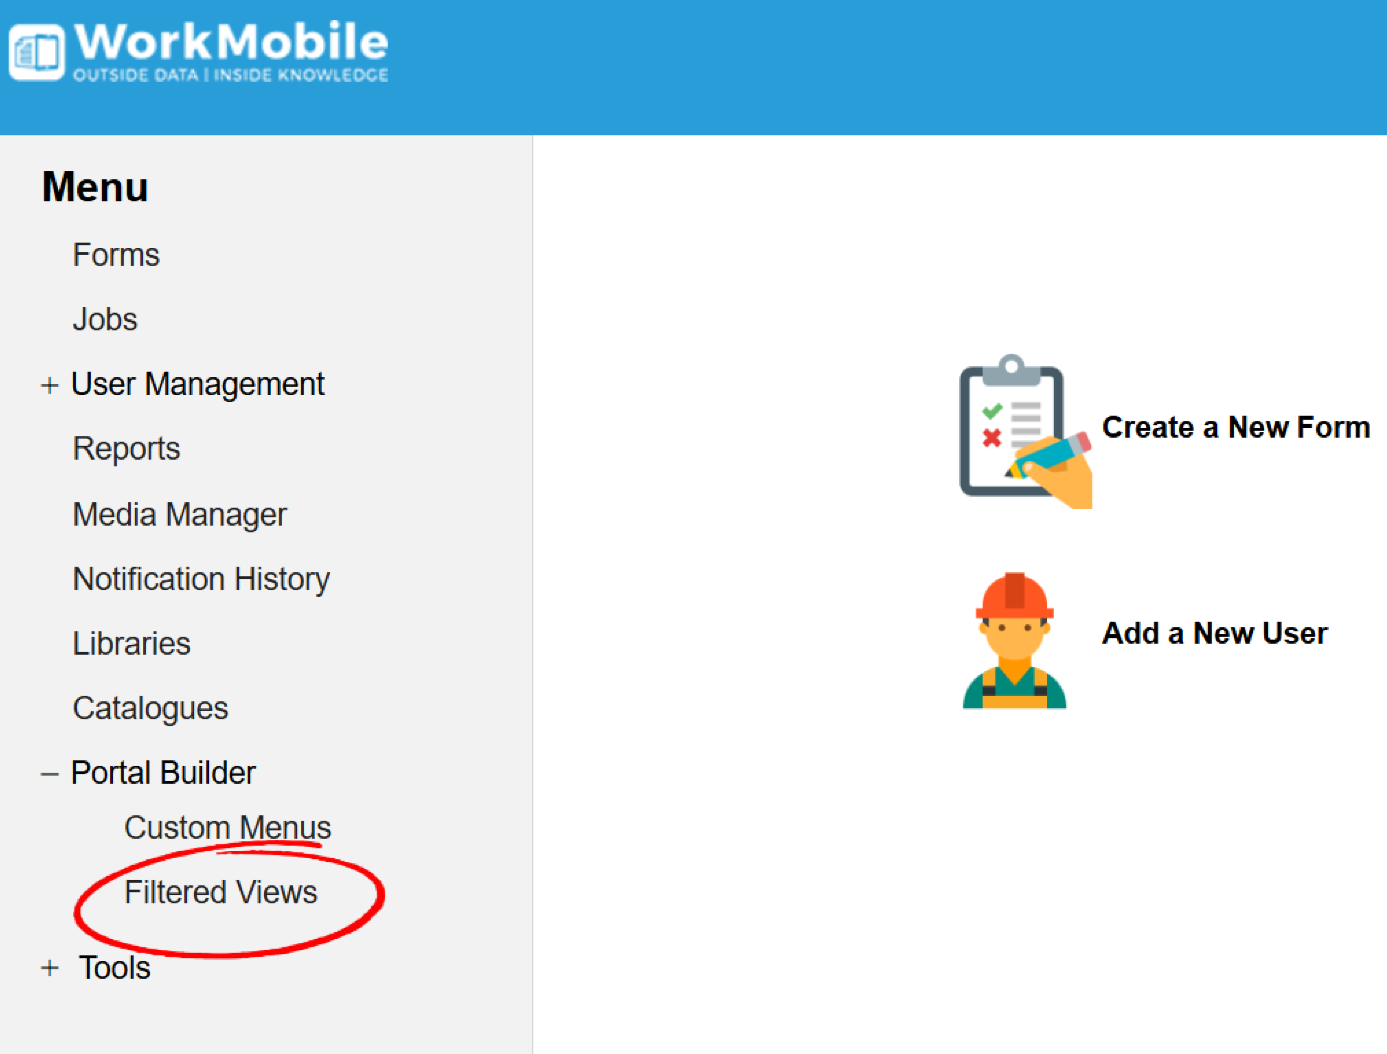
Within the WorkMobile dashboard, expand the Portal Builder menu item and select "Filtered Views"
When you are on the form dashboard for any of your Forms you will see the new “Filtered Views” option within the menu on the left-hand side of the screen, as shown on the image below:
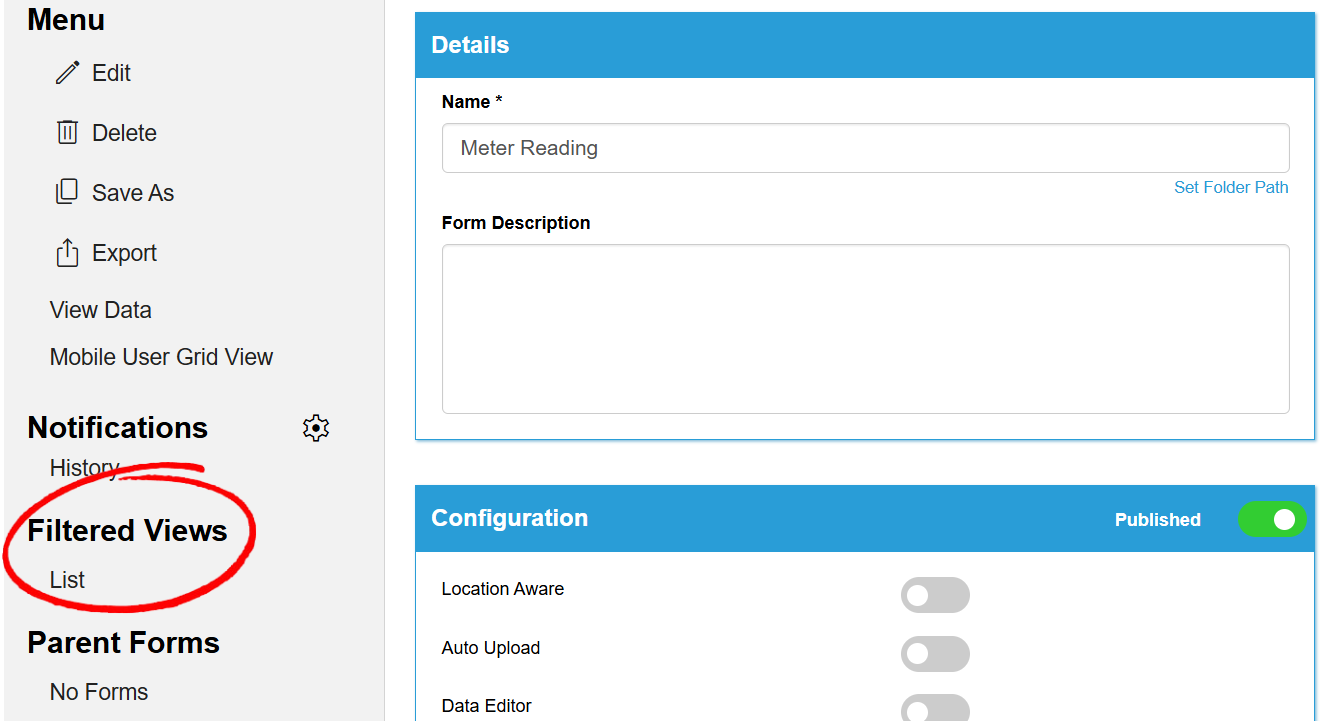
Upon selecting “List” here or selecting "Filtered Views" from the WorkMobile dashboard you will be taken to the Filtered Views page where you can create, access, view and edit Filtered Views on your account.
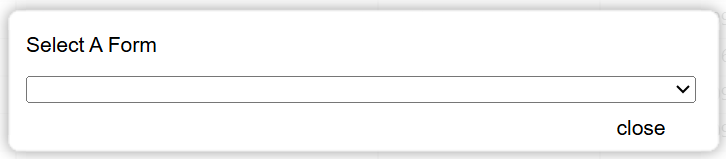
If you then select New Filtered View from this page, you will be asked to specify the form that you want to create a Filtered View for before being able to set it up
Creating a New Filtered View
Upon navigating to the Filtered Views page select "New" from the left-hand menu to create a new Filtered View.
You will then be asked to select the form you want to create the Filtered View for:
Upon selecting a form you will now be presented with the creation page and will have the option of 4 tabs to work through to set this up:
- Info
- Columns
- Filters
- Sorting
Info
The Info tab requires you to name the Filtered View that you are creating.
You will be presented with a single textbox titled “Name”, which will automatically display the name of the form that you are creating the Filtered View for, and it is up to you whether to leave this or you can change this to whatever name you would like.

We would advise giving your Filtered View a name that will enable you to identify exactly what the view is, as when you come to build your Custom Menu you will need to select the views you want based on the names.
Columns
The Columns tab requires you to select what data that you want to be visible within your Filtered View.
Within the table on the left, you will see all the System Fields that are automatically captured and included within each uploaded record (highlighted in yellow) and each of the individual data capture fields that are included within your form.
The table on the right is where you add the fields that you want to build the columns and the table that you want to see within your Filtered View when it is used.

In order to select the columns that you want within your Filtered View, you will move the required fields from the table on the left into the table on the right. This can be done in a number of ways:
- By using the “Add All” and “Remove All” buttons, to move all the system and form fields across in the order they currently appear in the table on the left.
- By using the individual select buttons on the right-hand edge of each of the fields within the table on the left to automatically add them, or the individual remove buttons on the left-hand edge of the fields within the table on the right to remove them. Adding the fields like this will automatically add the selected fields to the bottom of the table on the right.
- By dragging and dropping any of the fields you want to use from the table of the left onto the table on the right. Using drag and drop allows you to specify the position you want each of the fields to be in straight away, rather than adding them and then rearranging the list.
The order the fields are added into the table on the right is how the table will be built within your Filtered View and in order to make this as useful as possible, once you have added all the fields you want you can use the drag and drop method at any time to change this order.
System Fields that are added to the table on the right will need to be included at the top of the table, but can be rearranged amongst themselves to give you the desired order.
You can also use the Filter option above both left and right-hand tables to search for specific fields that you want to use.
Filters
The Filters tab is where you define what filtering you want to put on your data to make sure that you are seeing only the data you need.
When setting up your filters, you will select the fields you want to use from within the drop-down list at the top of the page, and the fields that you select will be moved to the Filtering List below.
The fields that can be used as filters within the Filtered Views are:
- Any of the System Fields
- Any of the data capture fields within the form that are marked as Searchable within the form designer

Upon the new filter appearing within the Filtering List, you will then need to configure the filter to make sure that you will see the data that you want.

For each filter that is added, you need to select whether that filter will be User Editable or not.
If you tick the User Editable checkbox, then when the data is viewed within the Filtered View, the user will be able to amend the filter to modify the data they can see.
If you untick the User Editable checkbox, then the filter you create will be locked and the user will not be able to amend this filter and will only be able to see the data that the filter you created brings back.
Text and Number Filters
Within the filters you have a number of operators that can be used to create the filter to make sure that you are getting the data that you want to get.
The operators that are available to use are:
| Operator Name | Description |
|---|---|
| Equal | This will display records based on the exact match of the text you enter |
| Not Equal | This will not display any records based on the exact match of the text you enter |
| Contains | This will display records with the specified value anywhere in the data |
| Does Not Contain | This will not display records with the specified value anywhere in the data |
| Starts With | This will display records with the specified value at the start of the data |
| Does Not Start With | This will not display records with the specified value at the start of the data |
| Ends With | This will display records with the specified value at the end of the data |
| Does Not End With | This will not display records with the specified value at the end of the data |
| Is Empty | This will display records with no value entered |
| Not Empty | This will display records with any value entered |
Once you have selected the operator you want to use, you can then add the data into the Filtered Value box that you want to filter on as shown in the image below:

Date and Time Filters
If you want to filter your data based on Calendar, Time, or Timestamp controls from within your form (including the System Fields such as Created Date and Upload Date) you get a slightly different set of options and parameters.
Time Filters
When filtering on a Time control, you either select the range of time you want to filter on, or you can leave your filter blank for the user using the filter to specify the ranges that they want to use.
The image below shows the Time filters when adding a range to filter on.

Date Filters
When filtering on a Calendar control, you can choose to filter on a specified date range or use a Macro to filter on a continually updating date range.
The image below shows the Date filter when selecting to filter on a specified date range:

Timestamp Filters
When filtering on a Timestamp control, you can choose to filter on a specified date range and time or use a Macro to filter on a continually updating date range and time.
The image below shows the Timestamp filter when selecting to filter on a specified date range and time:

Macros and Offsets
When filtering on Calendar and Timestamp controls you can choose to filter your data using Macros and Offsets, this allows you to specify a particular range without including fixed dates or times into your filter.
For example, you might want to filter your records based on the last 7 days, without including specific dates so that this filter will work every week without anyone having to manually update the date range.
Operators
When filtering on a CALENDAR control, the following list of Operators are available within the Macro for both the From and To dates, to help you filter your data:
| Operator | Function |
|---|---|
| Today | Displays the current date |
| Week Start | Displays the first day of the current week (week starting on Monday) |
| Week End | Displays the last day of the current week (Week ending on Sunday) |
| Month Start | Displays the first day of the current month |
| Month End | Displays the last day of the current month |
| Quarter Start | Displays the first day of the current quarter |
| Quarter End | Displays the last day of the current quarter |
| Year Start | Displays the first day of the current year |
| Year End | Displays the last day of the current year |
When filtering on a TIMESTAMP control, the following list of Operators are available within the Macro for both the From and To dates and times, to help you filter your data:
| Operator | Function |
|---|---|
| Now | Displays the current date and time |
| Day Start | Displays the start of the current day (00:00) |
| Day End | Displays the end of the current day (23:59) |
| Week Start | Displays the start of the current week (Monday at 00:00) |
| Week End | Displays the end of the current week (Sunday at 23:59) |
| Month Start | Displays the start of the current month (First day of the month at 00:00) |
| Month End | Displays the end of the current month (Last day of the month at 23:59) |
| Quarter Start | Displays the start of the current quarter (First day of the quarter at 00:00) |
| Quarter End | Displays the end of the current quarter (Last day of the quarter at 23:59) |
| Year Start | Displays the start of the current year (1st of Jan at 00:00) |
| Year End | Displays the end of the current year (31st Dec at 23:59) |
Macro Examples
Example 1:
You want to set up a filter that will display all data captured this week, from the start of the week up until the current day
For this you would set up the filter on your date field (for this example called Date of Reading), and use the “Week Start” operator for the From date, and the “Today” operator for the To date, as seen on the image below:

When run, this filter will display any data where the “Date of Reading” date is between the start of the week and the current day.
Example 2:
You want to set up a filter to display all the data captured within the entire current month.
For this, you would set up the filter on your date field (for this example called Date of Reading) and use the “Month Start” operator for the From date, and the “Month End” operator for the To date, as seen on the image below:

When run, this filter will display any data where the “Date of Reading” date is within the current month.
Offsets
Within the Macros you build, you can use the Offsets to filter on more specific date ranges using the Operators as the base. This means you can set up filters to bring through data captured within the last 2 weeks, or even the last 30 minutes, based on the time that the filter is run.
With the Offsets, you can manipulate the years, months, and days of Calendar control data, and for Timestamp data you can manipulate the hours and minutes as well.
Offset Values
Within the Offset boxes, you will enter either a positive or negative number into the required box to set how the filter will work.
If you want to a year/month/day/hour/minute into the future, then by adding a positive number (1) into the appropriate box, this will determine how far into the future the Macro will go.
Alternatively, if you want a year/month/day/hour/minute in the past, add a negative number (-1) into the appropriate box.
If you leave the Offset fields blank, this will leave the Macro unaffected.
Offset Examples
Example 1:
You want to set up a filter to display all the data captured in the previous 7 days from today.
For this, you would set up your Macro on your Date field (for this example, using Date of Reading) and use the “Today” operator as the From and To field.
Then to specify that the filter is looking for 7 days previous you would need to add “-7” into the Days box next from the From list, as seen on the image below:

When run, this filter will look for any data where the “Date of Reading” date is within 7 days previous of the current date.
Example 2:
You want to set up a filter to display all the data captured within the last 1 hour.
For this, you would set up your Macro on your Timestamp field (for this example, using Arrival Date and Time) and use the “Now” operator as the From and To field.
Then to specify that the filter is looking for 1 hour previous to now you would need to add “-1” into the Hours box next to the From list, as seen on the image below:

When run, this filter will look for any data where the “Arrival Date and Time” is within 1 hour previous of the current time.
Example 3:
You want to set up a filter to display all the data where a date field is set within the current and the next month.
For this, you would set up your Macro on your Calendar field (for this example, using Date of Reading) and use the “Month Start” operator as the From date and “Month End” as the To date.
Then to specify that the filter is looking for the 1 month in the future you would need to add “1” into the Month box next from the To list, as seen on the image below:

When run, this filter will look for any data where the “Date of Reading” is from the first of the current month to the end of the next month.
Sorting
The Sorting tab allows you to choose the fields within the Filtered View that you have created that you want the data to be sorted by when it is opened.
Within the Sorting tab, you have a drop-down list that includes all the System Fields and form fields for the form. This is where you can select any of these fields to sort the data, and upon selecting a one it will appear within the Sorting List.
Once a field appears within the Sorting List, you need to specify if the data needs to display in Ascending or Descending order, and then should you require, you can then add more fields to the Sorting List in order to make sure your data displays as you want it to.
When adding multiple fields to the Sorting List it is worth noting that the field at the top of the list will take priority and will sort the data first, then if the data for multiple rows is the same it will move onto the second field in the list and so on.

Within the Sorting List, you can include the System Fields and Form fields within the list in any order, unlike the Column tab the System Fields do not have to appear at the start of the Sorting List.